Easy ways to screen print with photo emulsion
Hiya!
I hope everyone is doing great this week :) I recently posted a video on 5 easy
steps to screen print using photo emulsion. However, I decided to include a
blog post on the subject, in case you might not be too keen on watching videos
or if you just want a brief explanation on the subject.
So,
here it is! 5 easy steps to screen print using photo emulsion.
Step 1
Apply photo emulsion
Use
your squeegee to apply a thin layer of Photo emulsion on both sides of the
board. Keep in mind not to put too much as a thin layer on both sides is
sufficient enough. Then put your board in a dark, dry area so that the board
could dry. (not letting the coated screen touch anything) The drying process
could take anywhere between 7 hours to overnight.
 |
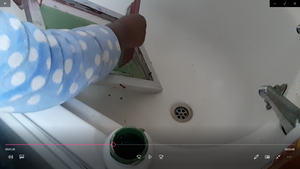
| Classy Robe! Oh yeah, and I also applying photo emulsion in the bathtub. |
Step 2
Design your stencil
You
can make your stencil traditionally or digitally. I usually draw my stencil
traditionally at first and then upload the image into Photoshop (or any photo
editing software). I then edit the photo and get rid of the darkness and
shadows in the image. After that, I also add the threshold effect unto the
image, this emphasizes the black lines and whitens the rest of the image. And
then you print out your stencil on acetate/ transparency paper (make sure you
pick the right paper for your printer either inkjet transparencies or laser jet
transparencies). Also, put the printer settings on "glossy photo paper/
glossy paper " when printing transparencies.
You
can also draw the stencil straight unto the transparency using an opaque medium
(like black Posca pen or matte India ink like the Dr Ph Martins India ink)
Step 3
Expose your stencil
Then
once your coated screen has completely dried, you then need to burn your
stencil onto your board. This is done usually with an exposure unit, but if
you're doing it at home you can simply use your desk lamp or the sun if it's a
sunny day. What you'll need to do is get your black sheet/card that covers the
whole board. Then lay the screen board on top of the black paper/card, and then
set your stencil in the board (place the printed side of the stencil on the
side where the ink is pushed through with the squeegee).
Then
place a pyrex glass on top of the stencil, and face the lamp towards the
stencil
*safety
tip: don't hold the head where the bulb is placed as it can get hot, and you
will burn yourself, so hold on the bottom of the neck of the lamp when exposing
stencil.
I
usually, let the stencil burn for a good 20 mins.
When
using the sun, simply use the same set up as the desk lamp exposure setting,
but simply placed on a flat set up facing the sun. As the sun is a powerful
natural source of light and UV rays, the exposure timing is really short
anything from 30 secs to 1 minute is sufficient enough.
Step 4
Wash off the softened emulsion
Then
after burning the stencil, I wash off the softened emulsion (which was what the
black lines were covering to make the stencil) to make the stencil come to
life. Essentially, you should be able to see a faint lining of the stencil on
the screen once you've finished exposing the stencil. Usually, you can wash off
the stencil with the force of the shower but in some cases, you may need some
help using a scrubbing brush to make the stencil clearer. Once the softened
emulsion has come off, you should be able to see through the stencil very
clearly.
Step 5
Finally, leave to dry
Once
you've finished washing off the softened emulsion, you should leave the screen
to dry, it will take roughly 30 mins. And then you'll be able to print!
 |
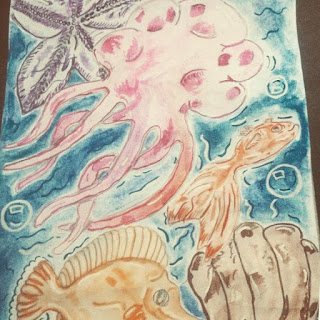
| Screenprinting with photo emulsion stencil |
It
is a long process, but once you've used photo emulsion a few times, you will
get the hang of it and find that you don't really need a large studio to make
screen prints or screen print art. If you'll still like some more visual aid,
you can check out my video on my channel!
Also if you have any other tips for screen printing with photo emulsion, please don't hesitate to comment down below!
Please like, comment and subscribe to my blog for more advice on screen printing, the freelance life and faith-based posts!
Thanks
for visiting, and I'll see you next week!
Have
a good one and keep being creative!
Glo
XO


Comments
Post a Comment